


🛵 Elevate your ride, protect your pride!
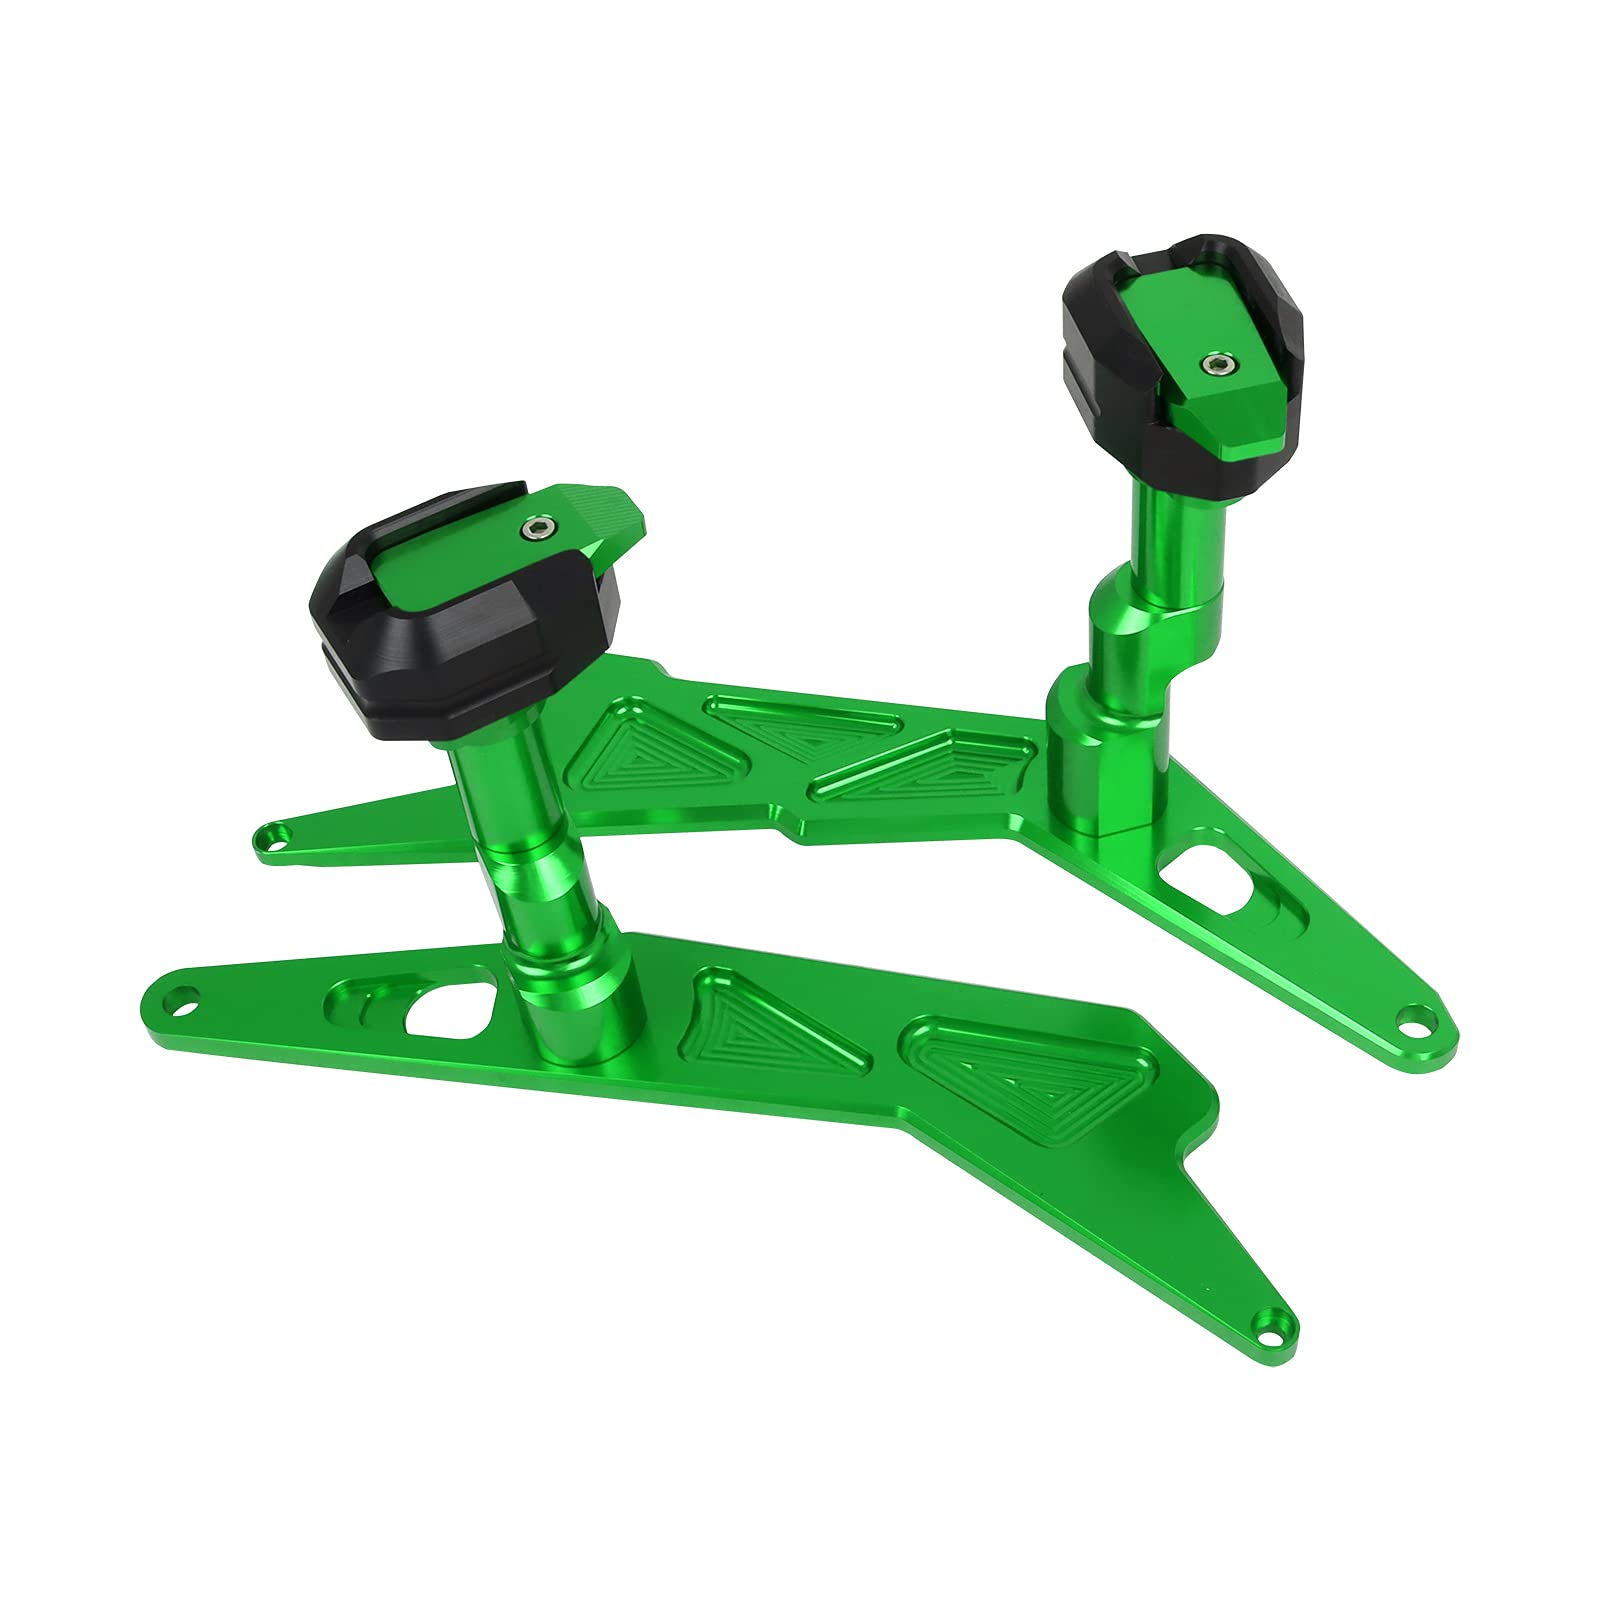
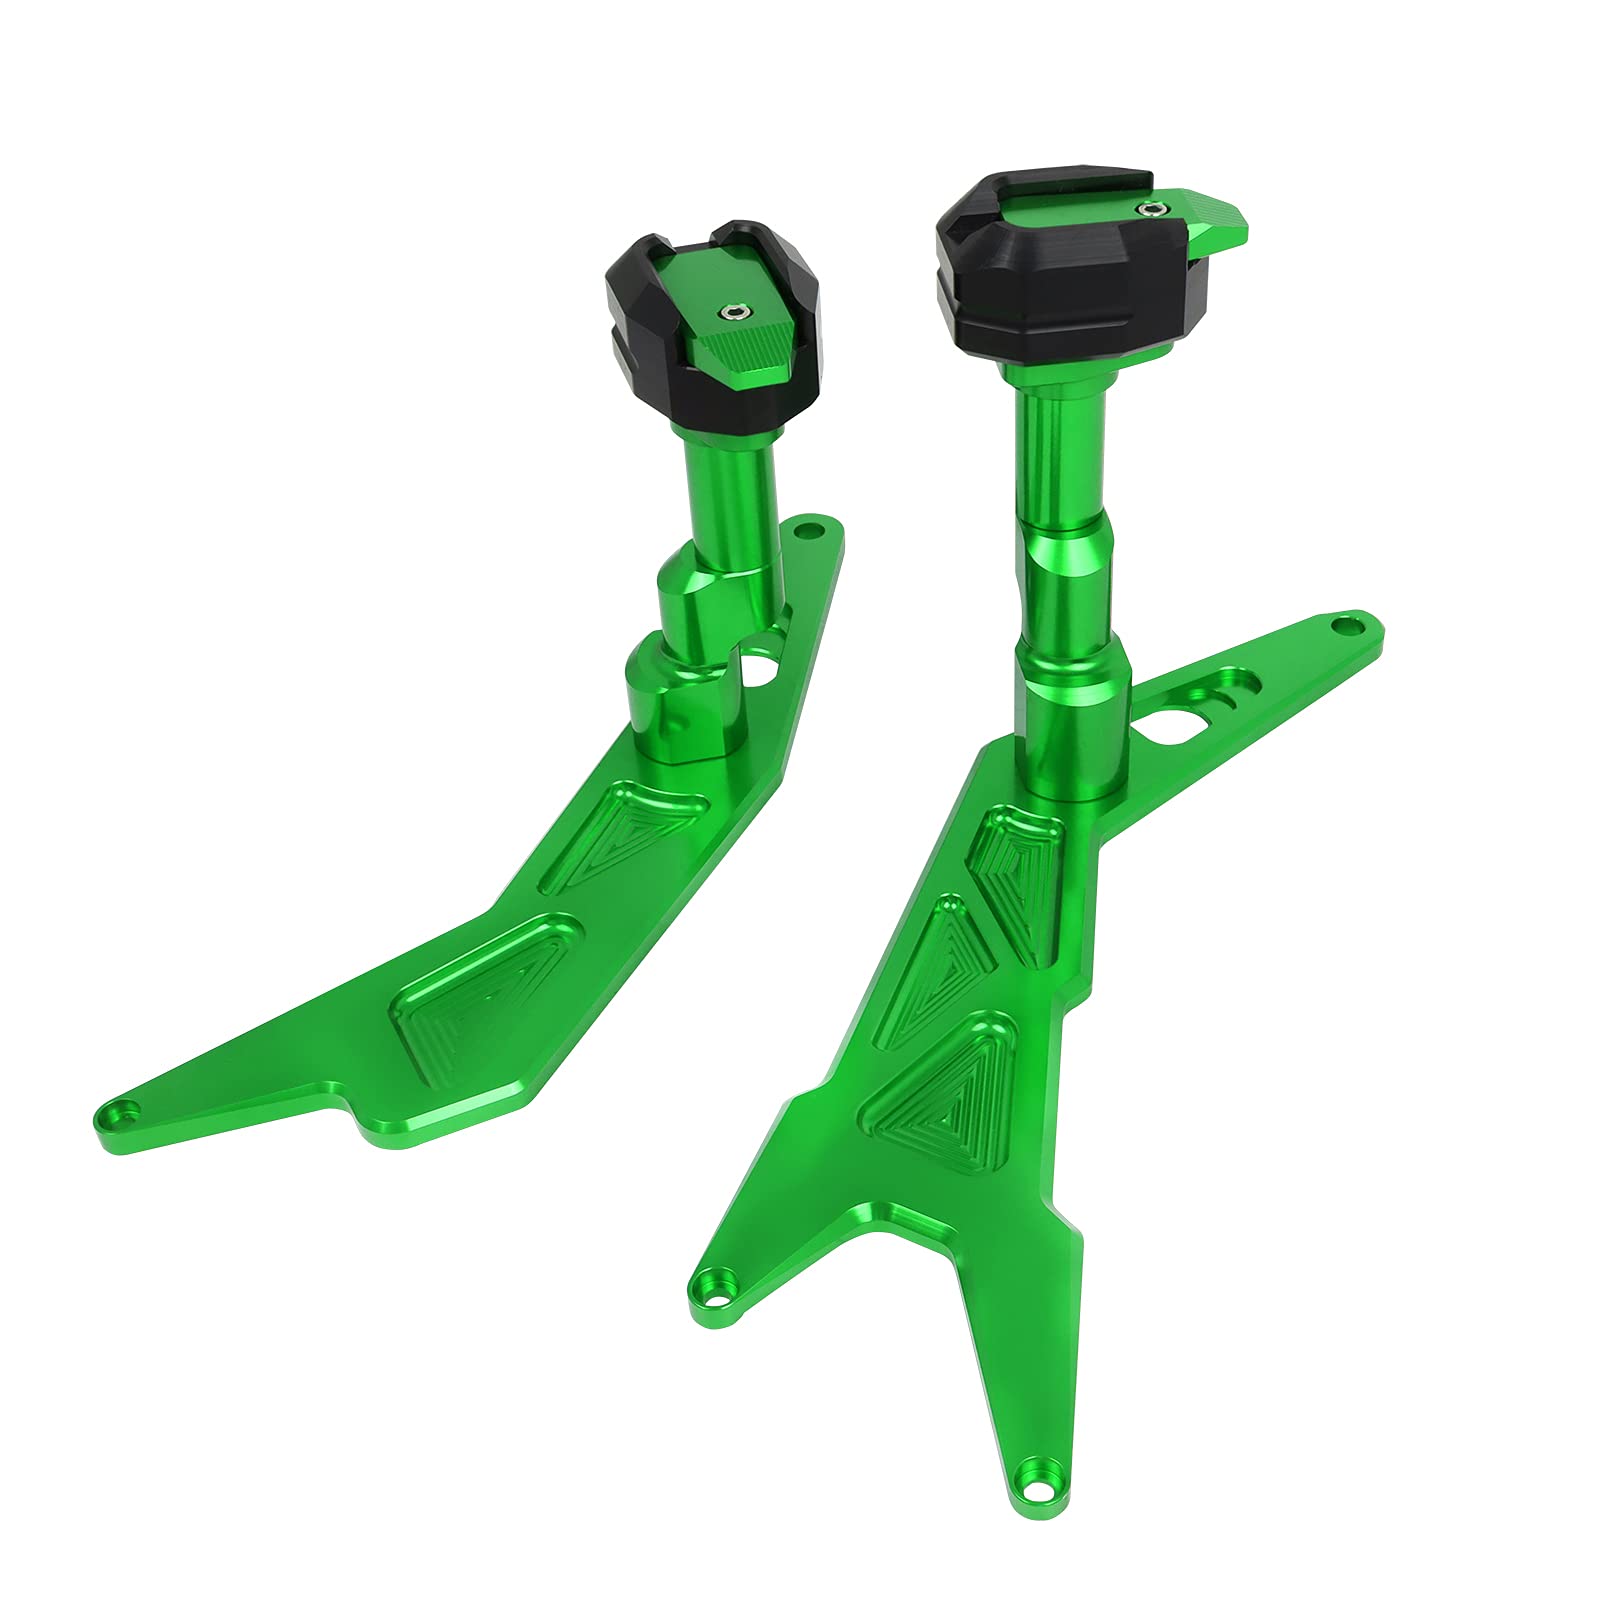
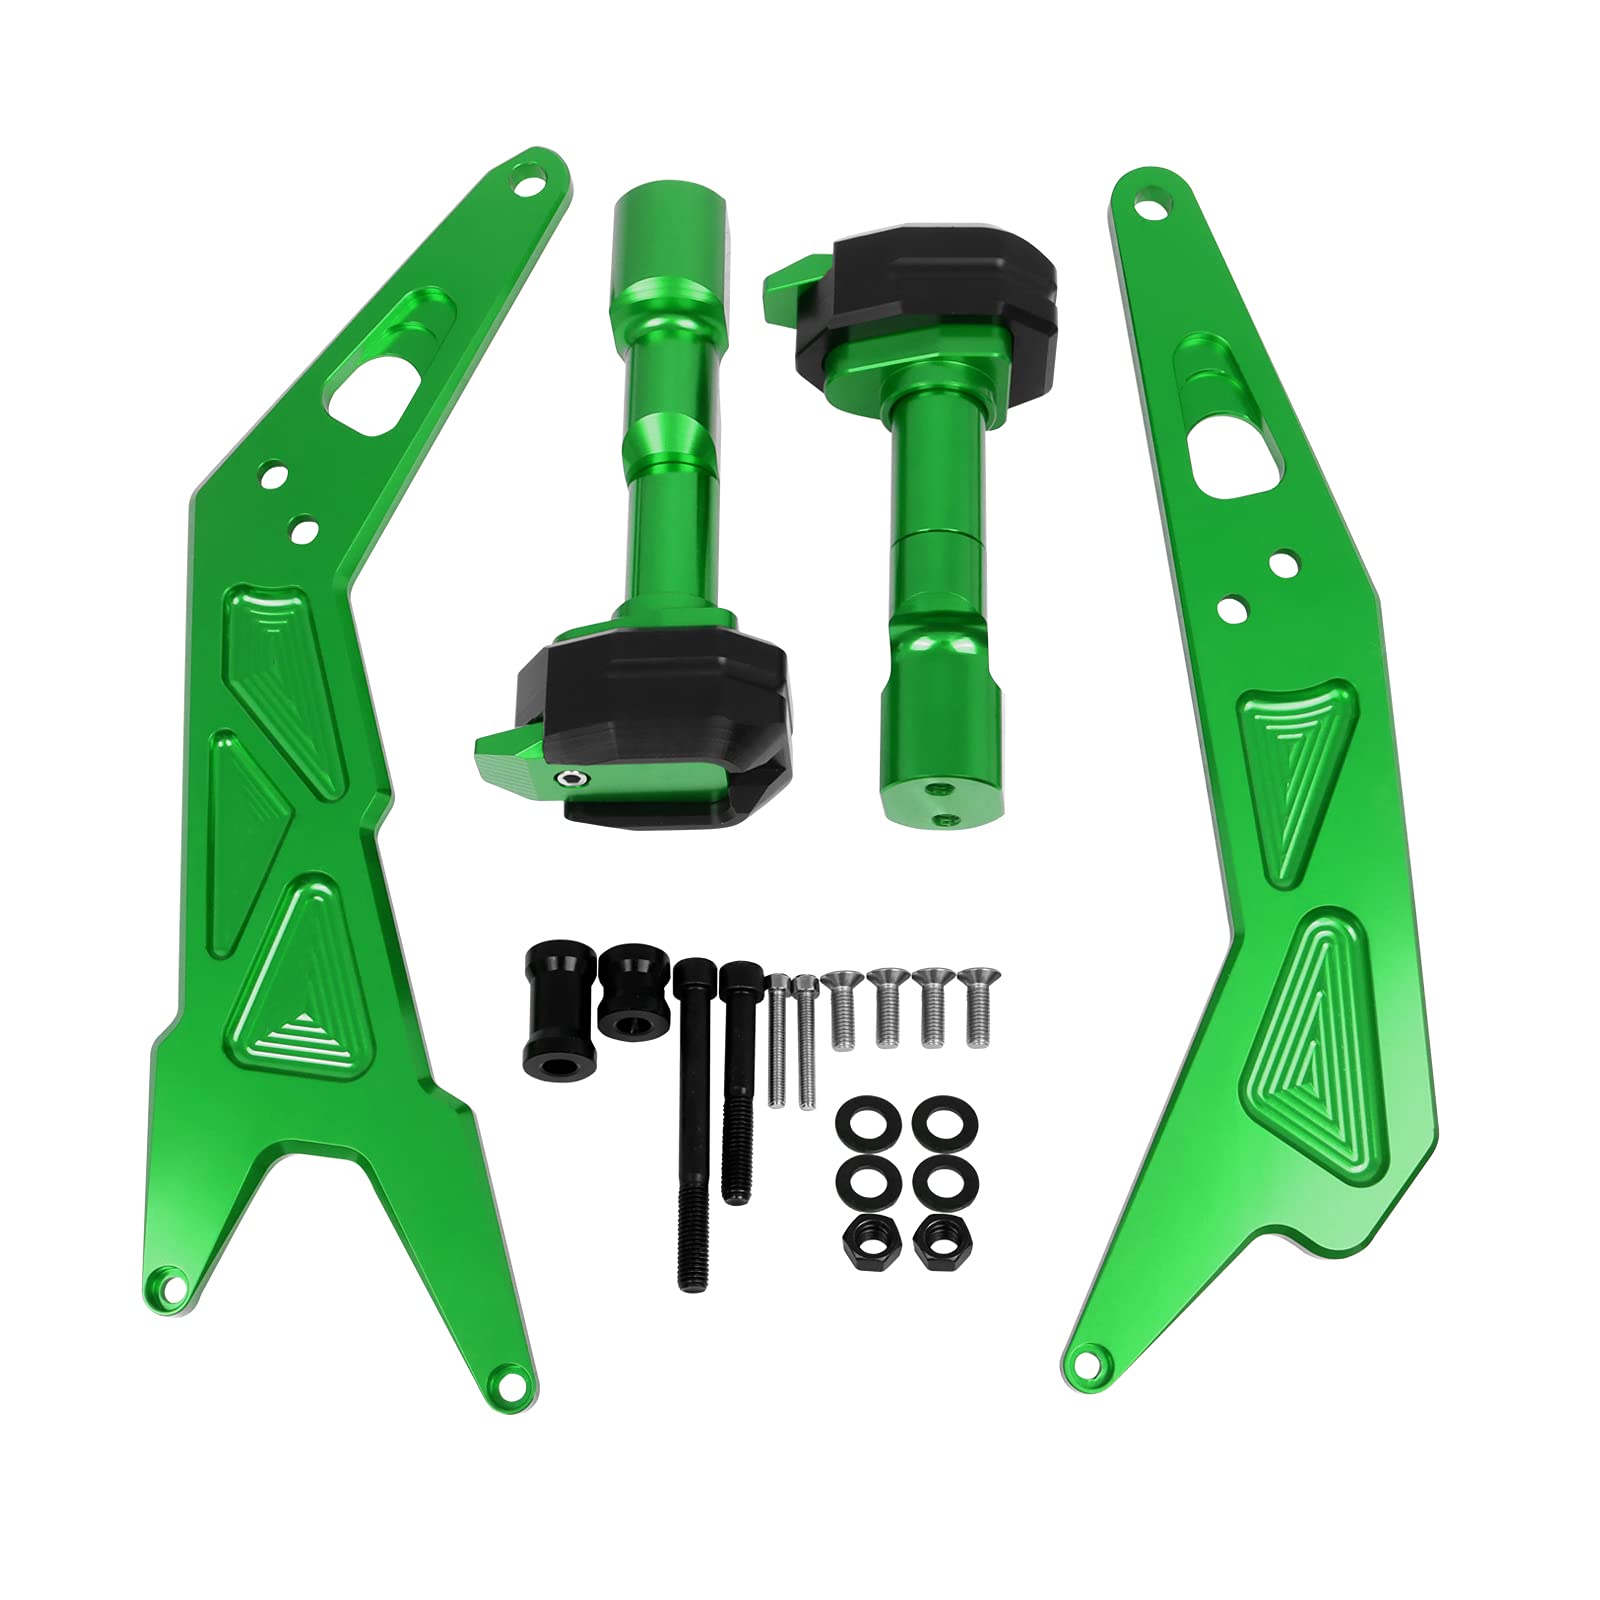
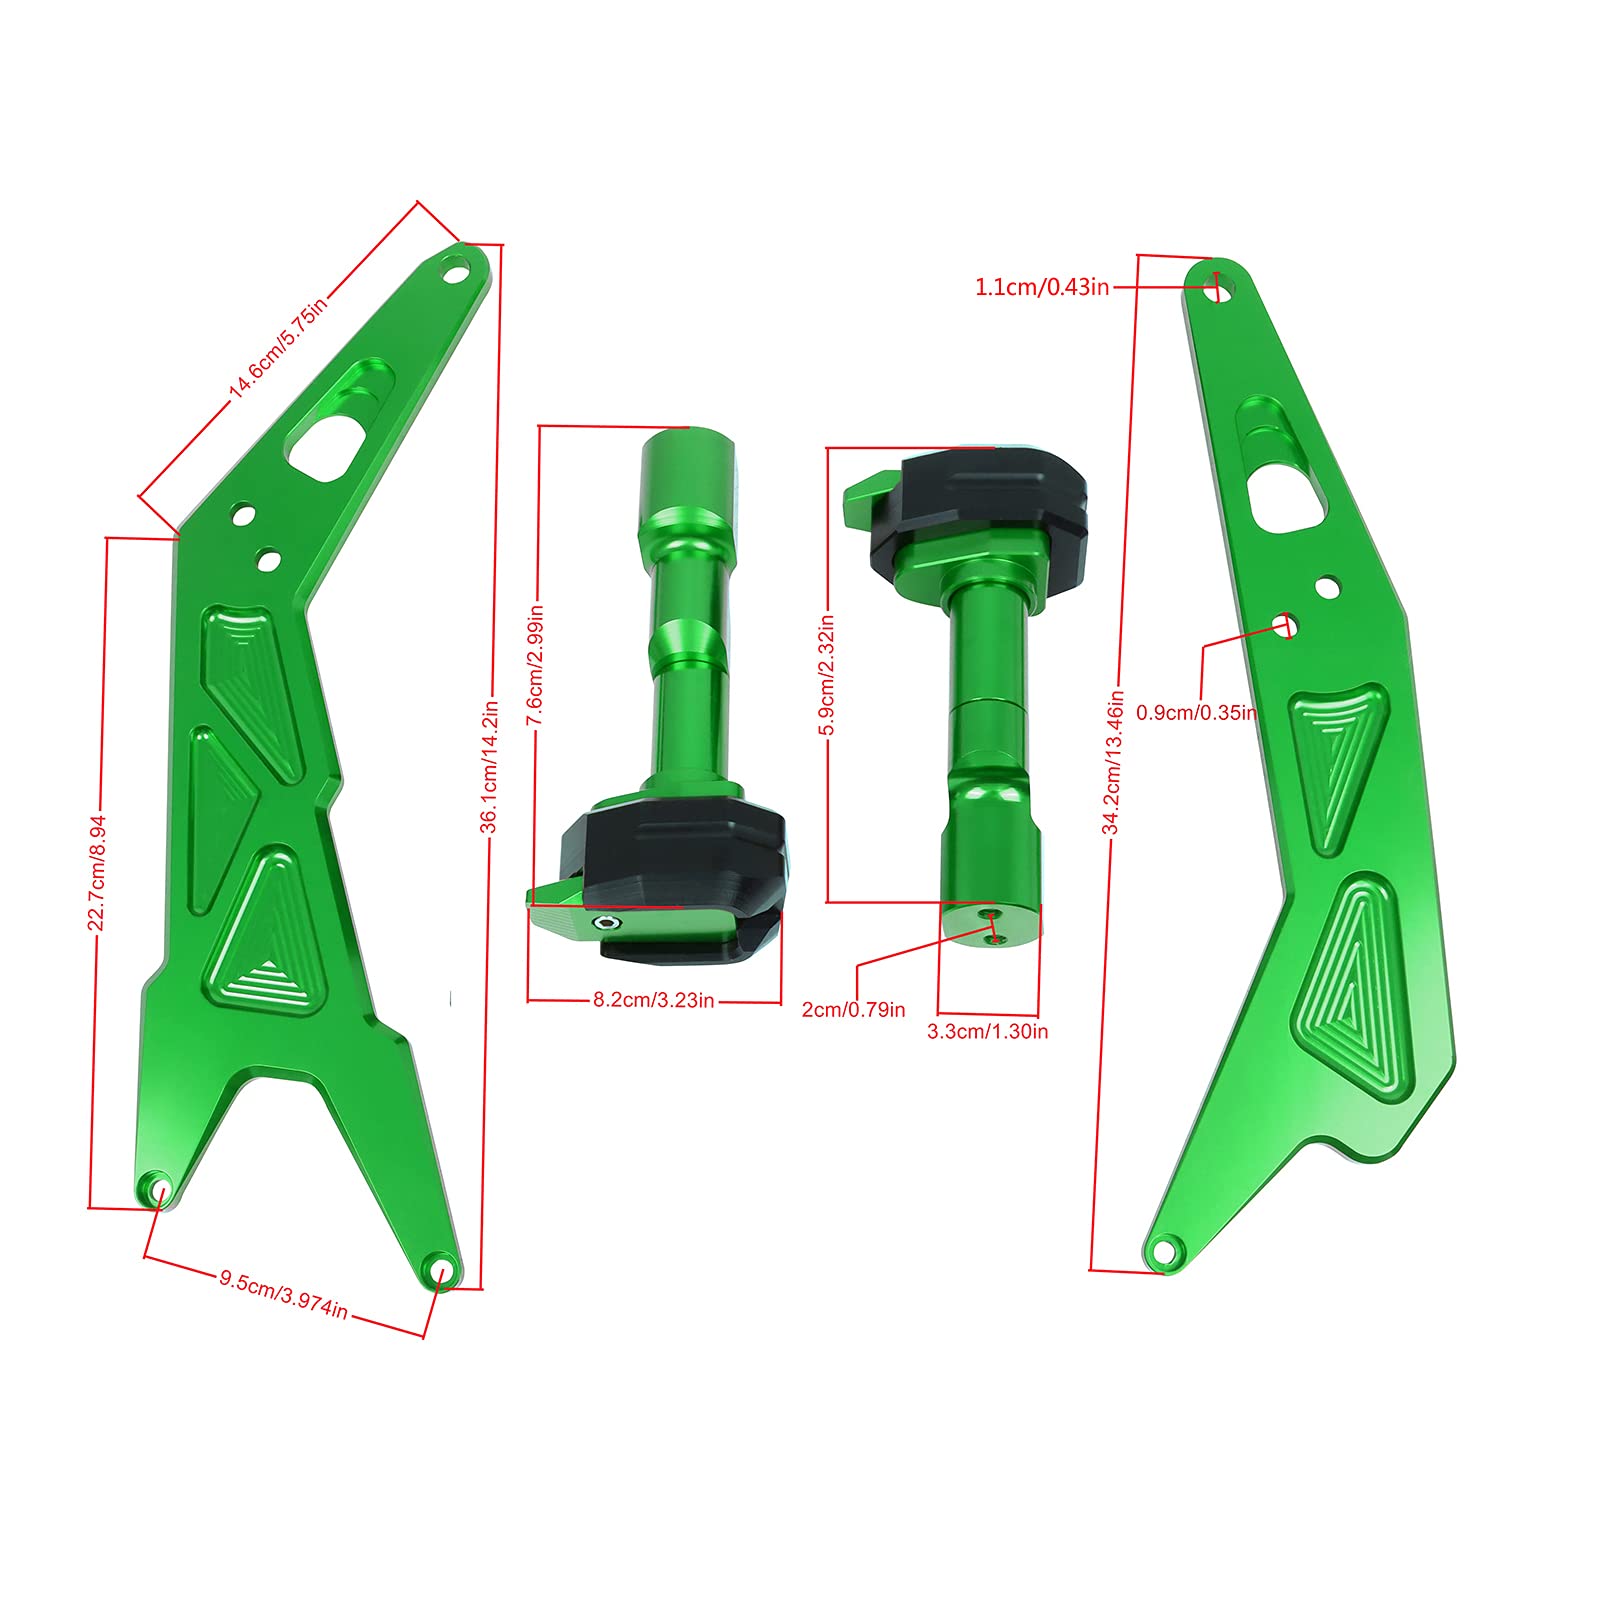
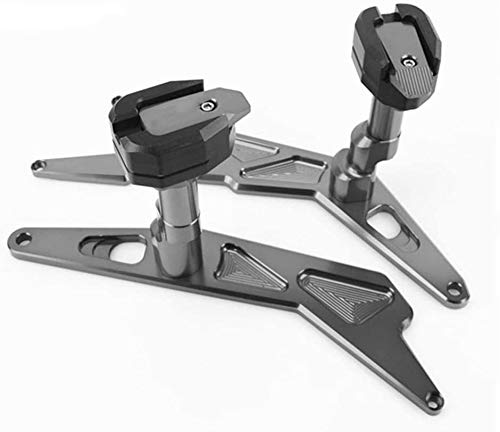
COPART Motorcycle CNC Engine Frame Sliders Falling Protection Replacement for Kawasaki Ninja 300 250 2013 2014 2015 2016 2017 2018(Green)
| Manufacturer | COPART |
| Brand | COPART |
| Item Weight | 4.54 pounds |
| Package Dimensions | 14.5 x 8.2 x 2.4 inches |
| Item model number | TZ-FSQ-NJ23 |
| Manufacturer Part Number | TZ-FSQ-NJ23 |
E**O
Noiiiceeee
The product came in respectable package quality. The instructions do their job, albeit being the bare minimum.
S**E
FRUSTRATING - MUST HAVE PATIENCE
These frame sliders are not the norm. These use multiple points on the engine itself to secure themselves instead of the standard single bolt frame slider that Vortex or Shogun might sell. Before buying or going into these for the looks alone - YOU WILL NEED PATIENCE, THE FORCE, THE SCHWARTZ AND A FLEXIBLE WRENCH HEAD SET AS WELL AS LONG MM ALLEN WRENCHES. If you do not own the long MM allen wrenches or a Flexible Wrench head set (16MM is a MUST), BUY THEM. You will not be able to hold that rear nut assembly in with your fingers. I wear a size XL glove and my hands do not fit where those nuts need to go.Make sure you have 2-3 hours of spare time, are having a good day, and have eaten before going into this job. Low blood sugar is only going to frustrate you more. BEWARE the red miquid id LOCTITE not LUBE. Once that stuff goes on it will cement whatever you are putting it on (I opted NOT to use it)! The LONGER head goes onto the CHAIN SIDE of the motorcycle because that side is deeper into the engine bay and will just barely stick out of the fairing when completed. You will need the SHORTER head as well as the Longer cylinder on the EXHAUST side of the motorcycle. The cylinder is going to be used as an extension behind the slider as there is a large gap on this side during installation.Good luck.
S**E
Sturdy but annoying
It's fairly easy to assemble with the paper they send with it, but I had no idea how to install so I had to go to previous comments and images is what helped me. Also when installing your plastics back on the head is to big so take that back off before butting back on your plastics, but overall great!
B**S
Perfect for my 2013 ninja 300
The media could not be loaded. Easy to install all the parts were included. I didn't have any issues.
R**O
2x now...No directions, nothing like the description, no impact...no idea
Still trying to figure this thing out.... no directions and doesn't look anything like the picture (I could have figured that out. The other 2 reviewers were quick to critique but not so quick to assist in thier secret of setup/installation. If I figure it out, I'll do the community and help y'all.Update #2:The company told me they'd send the right one and I waited...and they sent me this again, the same thing that I sent them pictures and told them was wrong.... 3rd time a charm maybe?
Z**N
Solid product
Product came as shown . But lacks any instructions . You can use the photo as a guide but buyers beware there are a long and a short side bar . The long goes on the left clutch side and the short goes on the right side . This is a very critical information to avoid having to take everything apart .
D**T
Technically, there are instructions BUT...
The instructions just give you a basic look of how they go together, not how to install them. Like many suggested, I used the shorter extensions on the left side, the longer on the right.The parts however, are CNC machined pretty well. Installing on a 2015 Ninja 300 ABS, you may have to modify or just unfasten the metal clip mount on the left side where the wiring is attached to. I just removed the clips from the assembly, removed the plate entirely, and ran the wires straight.With instructions, this would probably be a 5 star product, but even with all the tips and pictures of installations here, it's still a bit unnecessarily cumbersome.
D**9
Solid Pieces
Nice solid device. Gets 4 stars instead of 5 because of lack of instructions. Looks great and well constructed. Short spacer goes on right side, longer spacer goes on left side. You will have to remove OEM screws on both sides to add slider and screws. Nuts and washer may be a little awkward to screw on due to the backside placement to anchor on sliders plates. The head has two screw that needs to be remove to seperate until fairings are in place then place head of slider back on. Head left on in pic just for demonstration purpose to see landmarks.
Trustpilot
1 day ago
2 weeks ago