🚚 Elevate your adventure with style!
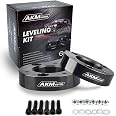
The AKM F150 Leveling Kit is designed for 2004-2022 Ford F150 models (2WD/4WD) and offers a true 2" lift using high-quality aircraft-grade aluminum. This easy-to-install kit enhances your vehicle's appearance and ground clearance, allowing for larger tires and rims, all while providing lifetime technical support.
| Brand | AKM |
| Auto Part Position | Front |
| Material | Aluminum |
| Included Components | Comes with housing |
| Maximum Lifting Height | 2 Inches |
| Manufacturer | AKM |
| Item Weight | 5.26 pounds |
| Package Dimensions | 6.93 x 6.69 x 3.98 inches |
| Country of Origin | China |
| Item model number | akmlift001 |
| Is Discontinued By Manufacturer | No |
| Exterior | Polished |
| Manufacturer Part Number | akmlift001 |
T**L
Fits 2019 f150
Bought this for a 2019 f150, crewcab 4x4, 3.5Ecoboost. Yes the kit fit, sat the truck dead level and wow it is drastic!If you are looking at this kit, I will say a couple things first about other posts. 1. For mine the ubolts fit fine and so did rear blocks, there could be a little too much paint on the block posts but they do fit. U bolts are trim to fit.2. Onto the front, you have seen the youtube vids. This kit is big so couple tricks I found on the 18-19 trucks. Wheel speed sensor can be unplugged inside the fender well, they are grey connectors. FolOpen the hood and from below follow the wire up, drivers side is right below the brake booster and passenger side is next to another connector just off the main harness at wheel wells. Second remove the rubber lines going to 4x4 hub on top of spindle. Next make sure to remove center axle nut, swaybar nut, steering nut, and caliper. Have a bungie or strong wire to support caliper. Remove the 10mm and 8mm screw on the knuckle holding the vac and wheel sensor wiring. Pull the trees out holding the lines to the frame for the same vac and wheel spd sensor. Remove the lower shock bolts. Now remove the upper arm bolt. My truck is very new so I didn't have to smack any of the joints they all popped right off. Here is the last two tips, one, when you pull the strut out you will be reinstalling it 180 out, you could simply swap them left to right, or yes you can actually move the lower mount to tilt it the other direction, what I did was set mine up on my vise stand with out the vice. I found that the strut bolts lined up perfectly with the bolt holes in my vise stand. I put the nuts on a few threads, gave it a little push and it moved fairly easy. Last thing, putting them in. Take your assembled strut with spacer bolted on. Bolt it up in the pocket all the way, note use the 3 slotted holes. Once that is in, you will need two 3 foot bars, pipes, Jackhandles or what ever you can come up with. You will take one and put it between the lower arm and its thin metal cross brace. The other bar you gotta put it under the strut between the two bolts, push the lower arm down and push the other bar up to force the bolts to the holes. Trust me, if you can get help, do it. And not your 13 year old that weighs 90 pounds. You can do this by your self, but it is tough as you will need to use your body weight to push the arm down. To be transparent, I am very mechanically inclined and have air tools, the front took me about 2.5 hrs doing one side at a time. First side takes the longest but the second side goes pretty fast. For the back, if you have those small Jack stands like the orange harbor freight ones, they will not be tall enough. I put them on 6x6 to get me the distance. You could stack up some 2x6 about 4-5" and you will be ok. Put a piece of wood on your Jack and lift it up under the pumpkin. I supported the rear of the truck at the frame behind the cab just before it bends up. Back is simple and if you have a grinder it will make your life way easier. Thread the nuts on. Ah also, ratcheting 22mm box end makes this job easy as well. Run the nuts up high as you can. You can do this with a 22mm box end but a 22mm socket would be easier. Also the kit comes with directions. Quality of this kit is top notch. It is huge and it definitely lifts the truck. Note to those that are not familiar with suspension. When you first set your truck down with the kit fully installed, it will look like the front is higher then the back. Drive it around as the springs will resettle. So far very happy with this kit. Just put 295-70r18 maxxis on stock wheels, NO spacers required! No rubbing, no crash bar cutting either, plenty of room.
S**N
Cheap and easy!
I got the 3” lift and level. The work took me five hours but I tried taking shortcuts. The construction of the parts is solid. Looks great if you ask me, the upper control arm is a bit tight angled but hasn’t affected performance yet. Plan to go to a six inch lift later so I can’t be bothered. I didn’t use the rear axle blocks being that my truck is the fx4 and had a 3” rake. So the truck sits at true level, with the rear blocks the back would be a half inch higher for anyone wanting to tow or heavy load. Sway bars are the biggest obstacle on this install, my solution was to just cut them out. Lol don’t be like me.
M**L
Bueno
Bueno
A**W
Great product, no install guide.
Sturdy product, all bolts included. Still feels great riding in the truck and the stance is awesome (see picture). I was able to fit 33” tires underneath, which is about as far as you want to go only with a leveling kit. The only thing is it doesn’t come with instructions, so the best option for me was to go to the RBP leveling kit listing on Amazon and download their installation guide. It’s not too complicated once you get all the nuts and bolts removed. Definitely a solid product, and the price point made it even better. It was a great first step for my truck mods. I will be recommending to others.
C**K
Best purchase I've made in a while!
This leveling kit worked perfectly and made my truck drive even better and look better!
T**H
Leveling kit
Easy to install
C**H
Works.
Did exactly what it was supposed too
Trustpilot
3 weeks ago
2 weeks ago